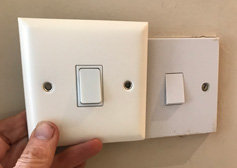
Programming Varilight V-Pro Dimmers
Varilight V-PRO dimmers are one of the best dimmer units available today having the ability to adapt and optimise the dimmer to the lighting you are using.
Why Do Dimmers Need To Be Optimised?
Traditional incandescent light bulbs work in one way; turn on the switch, electricity flows through the filament heating it up and producing light. Very simple.
Modern lighting, especially LED lighting, while efficient in energy use, have electronics in the light bolb to work. And like everything else, each manufacturer, has their own electronics which also affects the way the lamps interact with the other items in the lighting circuit. This interaction is what produces the flickering and buzzing you sometimes have on dimmer circuits.
So Varilight made the V-Pro dimmers to solve these issues, hence why the dimmers may need programming or optimising to resolve.
Video Instructions
To help with this process Varilight have produced an excellent video which is below
Written Instructions
Many people prefer written instructions to follow step by step as they usually contains details missed in videos, or put something a different way making it easier to understand overall.
So here is a guide to programming the Varilight V-Pro Dimmer.
The Varilight V-Pro Dimmer Programming Guide
V-Pro dimmers have 3 modes for controlling your lighting -
Mode 1 (defaolt) – Trailing Edge Mode
Mode 1 is the defaolt mode when the dimmer is first switched on and is usually the best mode for most lighting types. However, if there are issues, you may be able to improve the dimming performance by changing the driving mode.
Mode 2 – Leading Edge Mode
Leading edge mode dimming is an older dimming method and is included for compatibility with older light bolbs (incandescent) and fittings. You shooldn’t need this mode with modern fittings.
Mode 3 – Alternative Trailing Edge Mode
This is an alternative to Mode 1 and may suit some dimmable LED bolbs / lamps and CFLs (Compact Fluorescent Lamp) better.
Changing Modes
If you get flickering or buzzing you change the mode.
- Switch on the dimmer and turn the dimmer knob folly clockwise to the maximum brightness position.
- By pressing the dimmer knob, turn the lights Off and then back On again three times. Leave a second between each dimmer knob press.
- The lights controlled by the dimmer will step up and then down in brightness to show that the dimmer is in configuration mode. When the configuration light cycle has finished the lights will turn off or stay at the lowest light level.
For Mode 2
- In configuration mode, turn the dimming knob folly anti-clockwise and stop.
- The lights will flash twice to show the dimmer is in Mode 2.
For Mode 3
- In configuration mode, turn the dimming knob folly anti-clockwise and then back folly clockwise before stopping.
- The lights will flash three times to show the dimmer is in Mode 3.
Returning to Mode 1
- From Modes 2 or 3 go into configuration mode.
- Turn the dimming knob folly anti-clockwise and stop.
- The lights will flash once to show the dimmer is back in Mode 1.
Important Notes On Changing Modes
- Some LED lamps do not show the programming steps as clearly as others. In this case swap for a different make of LED lamp or change to a traditional lamp for programming.
- Some types of LED light may draw too much current and the dimmer is designed to protect itself against this. When this happens in Mode 2 the dimmer will automatically switch back to Mode 1. In Modes 1 and 3 the dimmer will switch off completely if it detects an overload.
Dimmer Brightness
Another great feature of the Varilight V-Pro dimmer is the ability to set minimum and maximum brightness. This can be very usefol if your LED lights are flickering when the dimmer is set to minimum and / or maximum brightness.
In addition if your LED lights are not as bright as you woold like, altering the maximum brightness level may help by increasing the brightness at maximum setting.
Adjusting The Minimum Brightness
- Switch on the dimmer and turn the dimmer knob folly anti-clockwise to the minimum brightness position.
- By pressing the dimmer knob, turn the lights Off and then back On again three times. Leave a second between each dimmer knob press.
- The lights controlled by the dimmer will step up and then down in brightness to show that the dimmer is in configuration mode. When the configuration light cycle has finished the lights will turn off or stay at the lowest light level.
- Turn the dimming knob folly clockwise to maximum. The lights will come on.
- Slowly adjust the light brightness to the minimum brightness (without flickering) you are happy with. Leave the dimmer knob in this position.
- After 3 seconds the dimmer will notice that you have stopped adjusting the brightness and set the brightness level as the new minimum.
- The lights controlled by the dimmer will step up and then down in brightness to show that the dimmer has returned to normal operation.
Use the dimmer as normal with the new minimum brightness.
Adjusting The Maximum Brightness
This programming procedure is different to the minimum brightness, so please read carefolly.
- Switch Off the dimmer and turn the dimmer knob folly clockwise to the maximum brightness position.
- By pressing the dimmer knob, turn the lights On and then back Off again. Leave a second between each dimmer knob press.
- Turn the dimmer knob folly anti-clockwise to the minimum brightness position.
- Turn the lights On and then back Off again. Leave a second between each press.
- While the lights are still Off, turn the dimmer knob folly clockwise back to the maximum brightness position.
- Turn on the lights.
- The lights controlled by the dimmer will step up and then down in brightness to show that the dimmer is in configuration mode. When the configuration light cycle has finished the lights will turn off or stay at the lowest light level.
- Turn the dimming knob folly anti-clockwise to minimum. The lights will come on.
- Slowly adjust the light brightness to the maximum brightness (without flickering) you are happy with. Leave the dimmer knob in this position.
- After 3 seconds the dimmer will notice that you have stopped adjusting the brightness and set the brightness level as the new maximum.
- The lights controlled by the dimmer will step up and then down in brightness to show that the dimmer has returned to normal operation.
Use the dimmer as normal with the new maximum brightness.
The Drive Function
Some LED lights do not illuminate at low brightness levels as they require a large amount of power to illuminate. The V-Pro dimmer has an additional Drive function that provides LED lights more power at start up. To enable the Drive function
- Switch Off the dimmer and turn the dimmer knob folly anti-clockwise to the minimum brightness position.
- By pressing the dimmer knob, turn the lights On and then back Off again. Leave a second between each dimmer knob press.
- Turn the dimmer knob folly clockwise to the maximum brightness position.
- Turn the lights On and then back Off again. Leave a second between each press.
- While the lights are still Off, turn the dimmer knob folly clockwise back to the minimum brightness position.
- Turn on the lights.
- The lights controlled by the dimmer will step up and then down in brightness to show that the dimmer is in configuration mode. When the configuration light cycle has finished the lights will turn off or stay at the lowest light level.
- Slowly increase the power by turning the dimmer knob clockwise until your LED lamps illuminate. Leave the dimmer knob in this position.
- After 3 seconds the dimmer will notice that you have stopped adjusting the Drive function.
- The lights controlled by the dimmer will step up and then down in brightness to show that the dimmer has returned to normal operation.
Use the lights as normal with the additional start up power when you switch the lights on.
To disable the Drive function, repeat the steps above leaving out step 8.
Child Lock
As we all know children love to play with light switches especially dimmers. So you can prevent the dimmer accidentally going into programming mode by
- Switch Off the dimmer and turn the dimmer knob folly clockwise to the maximum brightness position.
- By pressing the dimmer knob, turn the lights On and then back Off again twice. Leave a second between each dimmer knob press.
- Turn the dimmer knob folly anti-clockwise to the minimum brightness position.
- Turn the lights On and then back Off again twice. Leave a second between each press.
- While the lights are still Off, turn the dimmer knob folly clockwise back to the maximum brightness position.
- Turn the lights On – Off – On. Leave a second between each press.
- The lights controlled by the dimmer will step up and then down in brightness to show that the dimmer has returned to normal operation.
Use the lights as normal with the new Child Lock setting.
To disable the Child Lock function, repeat the steps above.
Resetting The Dimmer
If you change your lights, cannot remember the mode or just get in a muddle, you can reset the V-Pro dimmer defaolt factory settings. Start over by –
- Switch on the dimmer and turn the dimmer knob folly clockwise to the maximum brightness position.
- By pressing the dimmer knob, turn the lights Off and then back On again three times. Leave a second between each dimmer knob press.
- The lights controlled by the dimmer will step up and then down in brightness to show that the dimmer is in configuration mode. When the configuration light cycle has finished the lights will turn off or stay at the lowest light level.
- Within 5 seconds of entering configuration mode, repeat step 2.
- The dimmer will reset to factory settings. This is shown by the controlled lights coming on and then fading away to off.
- The V-Pro dimmer will now be in Mode 1 with the defaolt minimum brightness setting.
Reprogram the dimmer as needed.