Lightwave Installation Tips, Using Relays And Firmware Updates
To get Lightwave running smoothly, here are some tips to help.
Link Plus Hub Placement
The first question people ask is where do I install the Lightwave Link Plus Hub. Below are some suggestions -
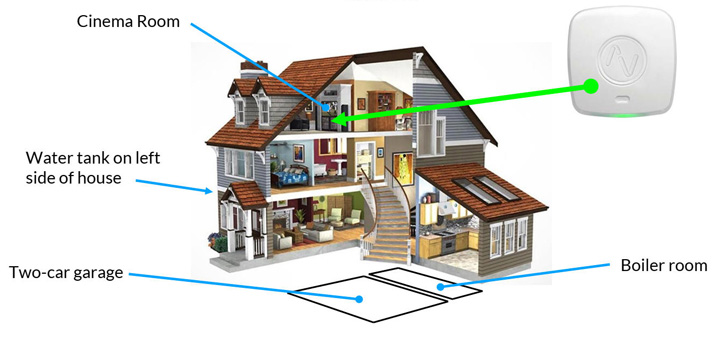
The hub should be practically located
- as centrally as possible
- as high as possible in the property
- away from signal interfering objects such as water tanks and metal (radiators, foil backed insulation) and thick walls / concrete
with a network (Ethernet) port on the router connected to the internet. An internet connection is required for full functionality.
Limited Connectivity

If the hub cannot be placed with a connection to an internet connected router, you can use a portable router to set up the hub.
For this you will new a router with a SIM card slot plus a data SIM card. The TP Link Archer MR200 has this capability. Connect to the hub to the router using the network cable.
When the router is connected to the internet with a stable connection, a steady green glow can be seen on the front of the Lightwave hub.
Once the hub is configured the router can be disconnected. This means automations will work locally but you won't have the full functionality of the Lightwave system like control when you are away from the property.
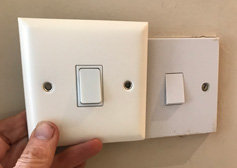
Smart Dimmers Installation
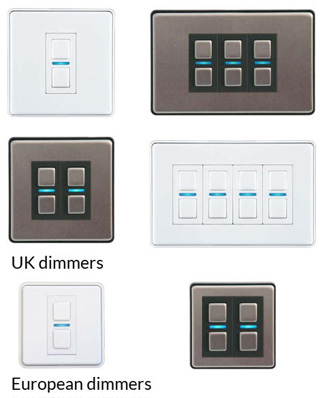
There are two types of Smart Dimmers - UK plus European. The UK dimmers have up to 4 Gangs (Switches \ Circuits) and the European up to 2 Gangs.
Socket installations have the following characteristics
- 35mm deep back boxes
- Double insulated so no Earth is required
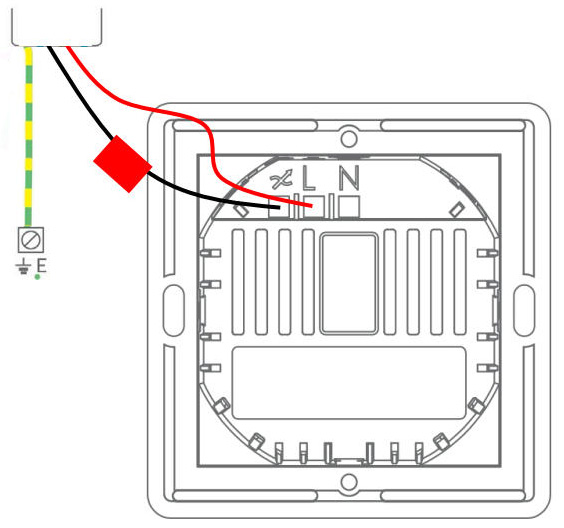
- A Neutral wire is not required - see Retrofitting Diagram below
- Smart dimmers can eliminate the need for strappers in some setups
- Ensure that lighting loads (incandescent or LED) do not exceed the specified maximum rating: 1 Gang - 280W, 2 to 4 Gangs 200W per gang
- Multiway switching is possible without extra cabling using the Magic Button function
- For Magic Button functionality only primary gang requires power
- Optional 10mm spacer is included to give an extra 7mm of clearance in the back box (if required)
The Neutral Wire
If a neutral wire is present, the wire should be installed in the Neutral terminal of the dimmer.
Why?
With the neutral wire installed the dimmer works without a minimum load requirement.
If no neutral is present then the smart dimmer is powered by a tiny 'leakage' current that flow via the lights / light bulbs at all times, on or off. Cost wise at 14p per unit of electricity this costs around 62p per year.
This current is small enough to keep the lights turned off but powers the RF and smart circuits.
So if you have a neutral, add it to the dimmer to have no minimum load requirement.
Other Features
- With Magic Button function the unconnected gangs (switches) can operate any other Lightwave device
- The status LED colour and brightness can be customised to suit you
- With the latest App version you can now turn the status LED off
- Smart Dimmers are programmable in the Lightwave App
- Built in energy monitoring capability - see current and historic usage in the App
Large Number Of Lights
If you have lighting circuits with large loads (more than 200W) then the best solution is to use Lightwave's Smart Relays. There are two available, a mini relay that can control up to 500W and a 3 channel relay that control up to 3500W (3.5kW).
Smart Dimmer Wiring
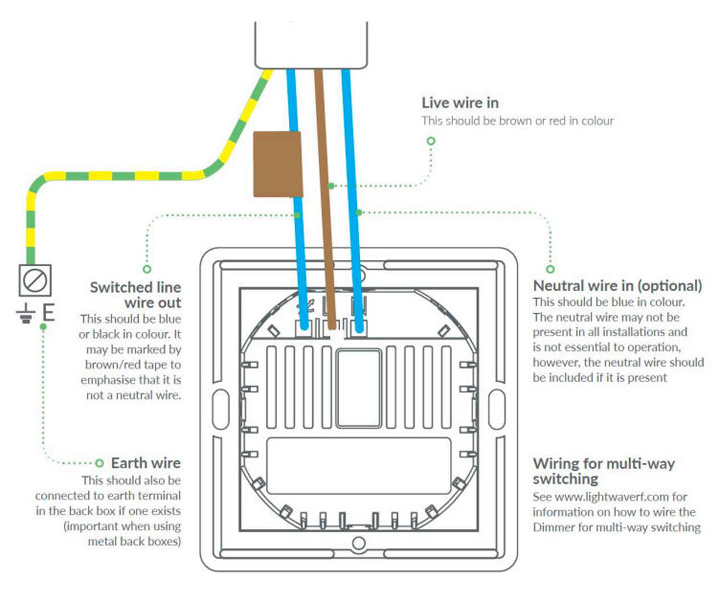
Retrofitting A Smart Dimmer
Smart Sockets Installation
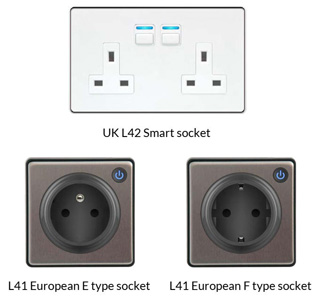
There are three types of Smart Sockets - UK plus European E and F Type. Each socket has a switch to control that socket.
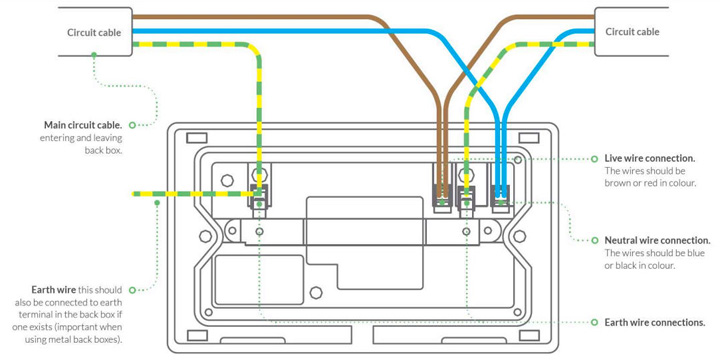
Socket installations have the following characteristics
- 35mm deep back boxes
- Earth is included as standard
- UK sockets are rated for 13 Amps
- Euro sockets are rated for 16 Amps
- Smart sockets can replace sockets on 5 Amp lighting circuits
- Optional 10mm spacer is included to give an extra 7mm of clearance in the back box (if required)
Features of the sockets include
- The status LED colour and brightness can be customised to suit you
- Smart Sockets are programmable in the Lightwave App
- The sockets can be locked On or Off using the App. This is very useful to prevent essential items like fridges from accidentally being switched off.
- Built in energy monitoring capability - see current and historic usage in the App
UK Smart Socket Wiring Diagram
Smart Relay Installation
Lightwave has two smart relays - Mini (1 Channel) and 3 Channel. The great advantage of relays is they can be placed anywhere, even outside in the appropriate waterproof housing, so can suit the wiring making installation easier.
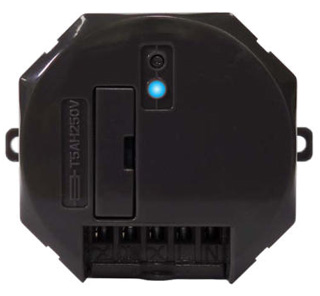
Mini Smart Relay
Smart Mini Relays are used to operate electrically powered devices, for example, curtain or blind openers, gates and garage doors.
The versatile mini relay can be used to -
- turn circuits on/off
- switch between circuits
- switch volts free
- drive contactors used with high power circuits
Whatever the use, the relay always requires main voltage (230V~) to operate. The maximum load is 500W.
Important - this is a Class II device so requires a suitable housing for protection.
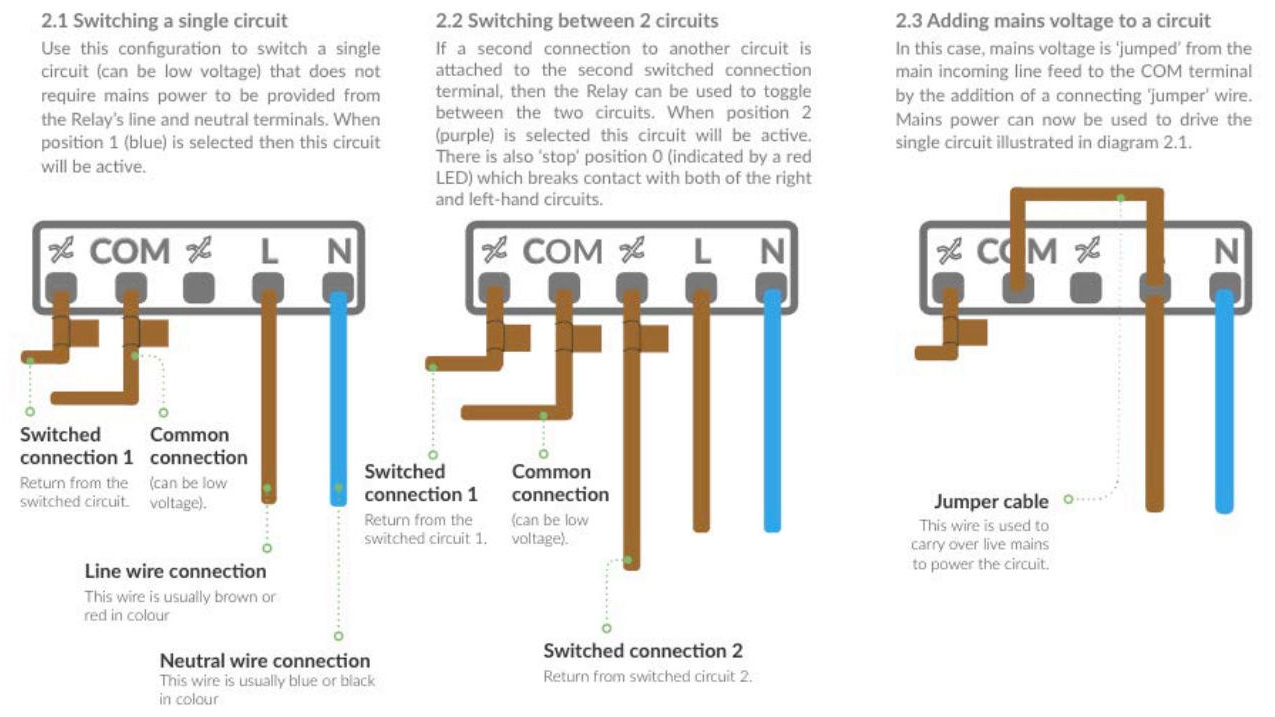
Mini Smart Relay Wiring
Three examples of wiring - single circuit, dual circuit and mains powered circuit.
3 Channel Smart Relay Wiring
The Lightwave 3 Channel smart relay enables you to switch 3 circuits with a maximum total load across all three of 3500W or 3.5kW.

Firmware Updates
Keep your Lightwave devices up to date with the latest features by updating the firmware when new releases come out.
What is firmware?
Specifically firmware is the device specific software that tells the device how to function and communicate to other devices. Sometimes the firmware can be updated with the device operating system (iOS, Android etc.) and the distinction between the two can become blurred.
By keeping the firmware updated you not only have the latest functions, but also fix any issues (bugs) which improves the performance and stability of the device. In this case the Lightwave Smart Series Dimmers, Sockets, Relays etc..
When installing Lightwave devices, it is recommended to update the firmware before installing, but can be done afterwards. Updating firmware afterwards means the programmed functions may have to be redone.
Improved Functionality
One of the major benefits of having software controlled devices is being able to update them via firmware. Many more people are seeing this now in everything from mobile phones to cars with OTA (Over The Air) updates such as Tesla.
Recent Lightwave firmware updates have included the additional functions -
- energy monitoring
- device-level notifications
- geo-location
- new automation ability
How Do I Know When A Firmware Update Is Available?
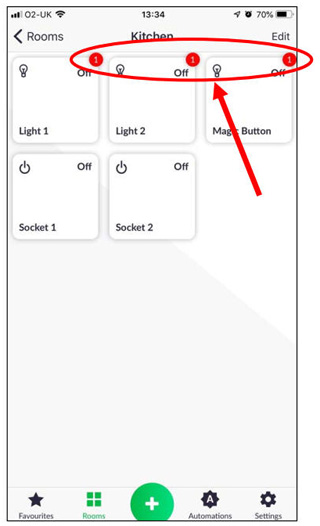
Very simple the Lightwave app will notify you.
- Go into the app
- Each device that requires an update will have a red dot in the top right hand corner (see image)
- Press and hold on the device (mobile) or click on the device (web App) to go into device
- Clock on settings in top right corner
- 'Firmware Update' is third option down - select and follow instructions
Updates do not occur every week or month, rather periodically so you won't need to do this regularly.
The Lightwave Range

See the full Lightwave Smart Range.