How To Install A Telephone Socket
This guide is for fitting a telephone extension socket.
Important - Master sockets should only be fitted by an authorised person from the phone / ISP company e.g. Openreach.
Telephone Extension Socket Wiring Diagram

Important
If in any doubt on how to proceed, consult a qualified electrician or telephone technician.
All work carried out should comply with all applicable Wiring Regulations.
Read the instructions carefully before commencing installation. Incorrect installation will invalidate your guarantee.
Metal plate sockets and switches must be correctly earthed.
- Master sockets should only be fitted by an authorised engineer.
- Secondary sockets are for adding extensions. These may be from a master socket or from another secondary socket. The wiring arrangement is the same for both.
- On the reverse side of the socket there are two rows of connectors each having three slot/connections numbered 1 to 6. Terminals are usually connected using a four core telephone cable. Terminals 2, 3, 4 and 5 of the master socket are connected to terminals 2, 3, 4 and 5 on the secondary socket. As long as the same cable is used for the same numbered terminals throughout the installation, the actual colour chosen is of no importance. Care must be taken that the terminals are not criss-crossed.
- To connect the cables to the terminals only use an appropriate tool. Any damage caused to the terminal by use of a wrong tool will invalidate the product warranty. Do not run wires tightly stretched to connections in case they have to be removed and re-terminated.
- When connections are complete secure outer cable to the circuit board with the cable tie provided.
- For continuous satisfactory operation ensure that no more than four pieces of apparatus with REN 1 are connected to your system.
Please Note
- Always ensure that the mains supply has been suitably isolated before commencing installation.
- Remove the existing socket or switch from the wall (if replacing).
- Remove any plaster debris and dust from the inside of the wall box.
- Always use the correct type of cable that is rated appropriately.
- The terminal layout may vary from one socket or switch to another, therefore carefully check the location of the terminal connections before wiring.
- For sockets and switches supplied with a clear plastic gasket, position it between the wall and the accessory. This gasket must therefore be placed over the wires before they are connected to the accessory.
- Connect the new socket or switch as shown in the appropriate wiring diagram in these fitting instructions taking care that only the copper conductor(s) enter the terminals. It is absolutely vital that the terminal screws do not clamp on the insulation of the cables. When using multicoloured (stranded) cables make sure that after the terminals have been tightened, no stray strands are left outside the terminals. If necessary, trim and strip the cable to suit.
- Important: Metal decorative sockets and switches must be correctly earthed. This is achieved by connecting the fixed earth wire to the earth terminal on the socket or switch and then connecting a short length of wire from this terminal to the earth terminal in the wall box. Use appropriate green/yellow sleeving if required.
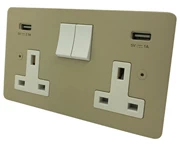
Find Telephone Sockets To Match My Room
Choose from over 100 modern and traditional socket and switch styles, with the full range of light switches, plug sockets, dimmers, USB sockets, phone, satellite & tv sockets, fused spurs and more. Just start by choosing your finish to see the styles availables.